


This blog is guest authored by Croteam developer Karlo Jez and he will be giving us a detailed look at how Affinity Multi-GPU support was added to their game engine.
Introduction
Let’s say you’re in a store deciding which headphones to buy. You don’t want to spend too much money so you settle for a nice inexpensive wired pair with good sound but an inexpensive cable. Inevitably, the cable is damaged and you’re back in the store – you already spent money on this and you don’t want to break the bank on headphones. We all know how this ends. You end up purchasing the most expensive pair of headphones that you should have bought in the first place.
Short term development
Similarly, when you first need to add virtual reality rendering support to an existing game engine, you want to do it as quickly as possible just to be able to see the results and then decide where to go from there. You’d usually do this by simply rendering the entire scene twice with different matrices for each eye. The problem with this approach is that it results in bad performance because it doubles the draw calls, but on the other hand it gives you a correctly rendered VR scene without too much effort. The more efficient approach would be to render the entire scene in one pass.
Taking a single pass approach means we only run the rendering once per frame, for both eyes simultaneously, which significantly decreases CPU overhead. This is obviously what we want to have in the end, but the downside is that it’s often a lot harder to implement in an existing engine as it requires changing a lot of code.
We wanted to add LiquidVR Affinity Multi-GPU rendering support to our engine because two GPUs can render the two eye views in almost half the time compared to a single GPU and this would greatly reduce our GPU bottlenecks. Affinity MGPU can either be done in one pass or with a separate pass for each eye, in which case we reap the GPU side benefits while the CPU workload stays the same.
Initially, we applied the same Keeping Things Simple philosophy to Affinity MGPU VR rendering as we initially did for single GPU and decided to do it in two separate passes. After adding such support to the engine, we added the required calls so that the first rendering pass goes to the first GPU and the second rendering pass goes to the other GPU. After rendering the scene on the other GPU, it is copied to the first one and submitted to the VR compositor. That was easy. Compile, run, but unfortunately it did not work. One eye was displayed perfectly, while the other was completely black or just garbled.
Required changes to our Engine
The root cause of the incorrect eye display was that our engine wasn’t affinity-aware – e.g. binding a texture on one GPU prevented us from binding the same texture on the other one because it was already marked as bound. Easy fix – just forget texture states after rendering each eye. Then we found out that we read from a surface that is empty on one GPU because we only rendered to that surface on the other one. This can be fixed by setting affinity to both GPUs before any render to texture that needs to be read on both GPUs.
We discovered many similar problems and we worked on this simple solution for a couple of weeks and actually managed to fix almost all of the rendering issues. This resulted in a solid performance boost in GPU bound scenarios, but we gained nothing in cases where we were constrained on the CPU. We would need to spend more time to find and fix the remaining rendering issues, so we decided to bite the bullet and move to single pass rendering.
Long term development
The easiest way to do single pass rendering for Affinity MGPU is to set different per-eye values for constant buffers on each GPU and then render the scene by broadcasting commands to both GPUs at the same time. This was a problem for us because our large catalog of shaders worked with different sets of constants – some only had the model-view-projection matrix, some needed a separate view or projection matrix, some shaders needed only parts of the projection frustum, position of the viewer, some matrix inverse or position of the object in view space. All this data was passed using different constant registers and no two shaders had the same kind of constants. This prevented us from just passing an initial set of values for each eye and using them directly in each shader.
An additional requirement was that we wanted to use the same system for single pass rendering on a single GPU and having different values in the same constant buffers is not possible there, we can only query which eye we are rendering.
Our solution was to duplicate all eye dependent data in the shaders so that each shader has access to both left and right eye data at the same time. We added a single global constant, accessible to all shaders, which is set using affinity to 0 on the first GPU and 1 on the other. We then use either the left or right eye data, depending on that constant (or another predefined constant in case of single GPU rendering).
Code details
We will now discuss some coding details. The following is some pseudocode of a simple multiple pass single GPU rendering function:
// do the rendering pass for the left eye
vrSetCurrentEyeLeft();
vrRenderFrame(vrEyeRenderTargetLeft);

// do the rendering pass for the right eye
vrSetCurrentEyeRight();
vrRenderFrame(vrEyeRenderTargetRight);
Here’s how it would look when adapted for single pass Affinity Multi-GPU rendering. Notice that rendering is done only once, but the preparation and copy after rendering is done for each GPU separately.
// upload constant value of 0 on the first GPU
gfxDevice->SetGPUAffinity(1);
gfxDevice->UploadSinglePassVRConstant(0);

// upload constant value of 1 on the second GPU
gfxDevice->SetGPUAffinity(2);
gfxDevice->UploadSinglePassVRConstant(1);

// render the frame on both GPUs (we use the same buffer for both eyes)
gfxDevice->SetGPUAffinity(3);
vrRenderFrame(vrSingleRenderTarget);

// copy from the common buffer on the first GPU to the left eye buffer
gfxDevice->SetGPUAffinity(1);
gfxDevice->CopyDrawPort(vrSingleRenderTarget, vrEyeRenderTargetLeft);

// copy from the common buffer on the second GPU to the right eye buffer and transfer it to the first GPU
gfxDevice->SetGPUAffinity(2);
gfxDevice->CopyDrawPort(vrSingleRenderTarget, vrEyeRenderTargetRight);
vrTransferRightDrawPort();
It’s interesting to note that passing both left and right eye matrices does not necessarily mean sending twice the amount of data to the GPU. Only one matrix has to be sent completely, and for the other one we only need to send the data that’s different. We’ve noticed that in case of (model) view and projection matrices this is only the first (X) row since the only difference between the eyes is their horizontal offset (in view space) and the different horizontal offset of the frustum. This means that only the X coordinate in view and clip spaces will be different when transforming a point for each eye.
Logic for handling which eye data to select is in a separate header that looks something like this:
// constant that contains either 0 or 1 (depending on the current eye)
cbuffer VREye :register(b1) {float fVREye :packoffset(c0);}

// sets the first row of the given transform matrix
inline float4x4 vrAdjustXRow(float4x4 mMatrix, float4 vRightX)
{
    mMatrix._m00_m10_m20_m30 = lerp(mMatrix._m00_m10_m20_m30, vRightX, fVREye);
    return mMatrix;
}

// selects either the left eye or the right eye variable
inline float3 vrSelect(float3 vLeft, float3 vRight)
{
    return lerp(vLeft, vRight, fVREye);
}
This is then used in each shader as needed, e.g.:
mObjToClip = vrAdjustXRow(mObjToClipLeft, vObjToClipRightX);
vViewPosAbs = vrSelect(vViewPosAbsLeft, vViewPosAbsRight);
This approach worked perfectly well on the Oculus Rift but after some testing we found a small vertical offset error when rendering on Vive because the projection frustums are individually calibrated for each eye on each device. This means that a projected point can have different Y coordinate values between the eyes in clip space, making our optimization worthless. To get around this problem, we rendered to each eye using the maximum vertical extent of both frustums and we compensate for that when submitting the rendered texture to the VR compositor by only sending the part of the image that fits in that eye’s frustum.
Analyzing the data
In this section we will discuss the results we achieved for single and Affinity MGPU implementations.

Figure 1 : Single GPU performance
In Figure 1, we show SteamVR™ GPU and CPU frame timings on a reference scene with a single Radeon™ RX 480. You can see that while the CPU usage is ~8 ms per frame, the GPU is overloaded with work (12 ms) which prevents it from running at 90 frame per second(FPS). The red line in the graph means SteamVR reprojection has kicked in (decreasing the framerate to 45 FPS).
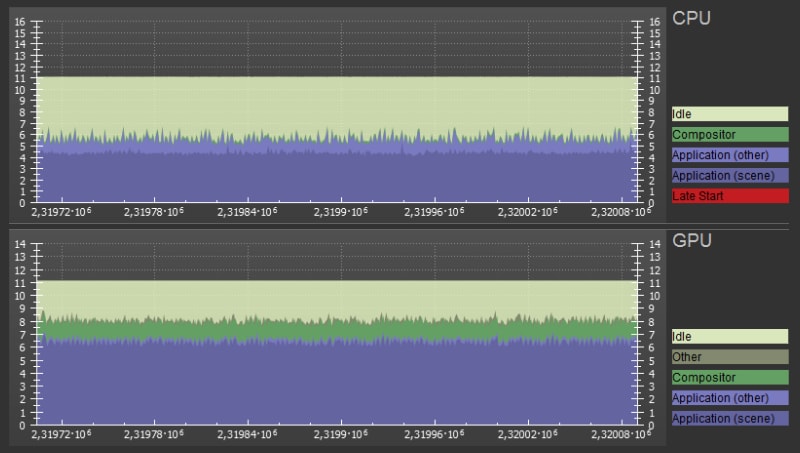
Figure 2 : Affinity Multi-GPU performance
In Figure 2, we show the same scene with Affinity MGPU on two Radeon RX 480 cards. CPU usage has decreased from ~8 ms to ~5.5 due to single pass rendering and GPUs finished their work in ~8 ms. This gives us enough time to run the game at steady 90 FPS.
Summary
We needed about a week to modify all shaders and to make sure that correct data is set for each eye. Single pass rendering with Affinity Multi-GPU gave us a huge speed improvement on both CPU and GPU from our original VR implementation. In the end, it took us less time to do single pass rendering correctly than it took us to fix all the problems caused by multi pass multi-GPU rendering.

LiquidVR™
LiquidVR™ provides a Direct3D 11 based interface for applications to get access to the following GPU features regardless of whether a VR device is installed on a system.
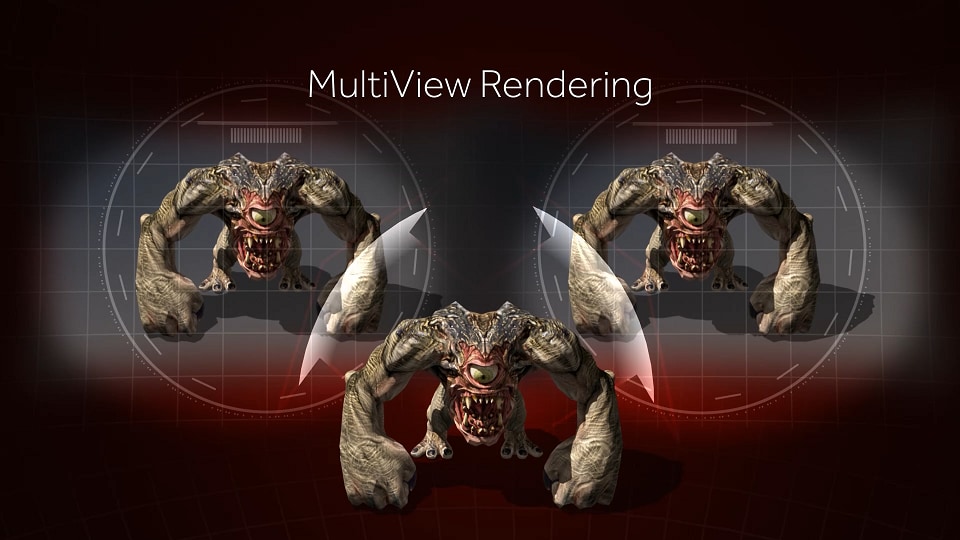
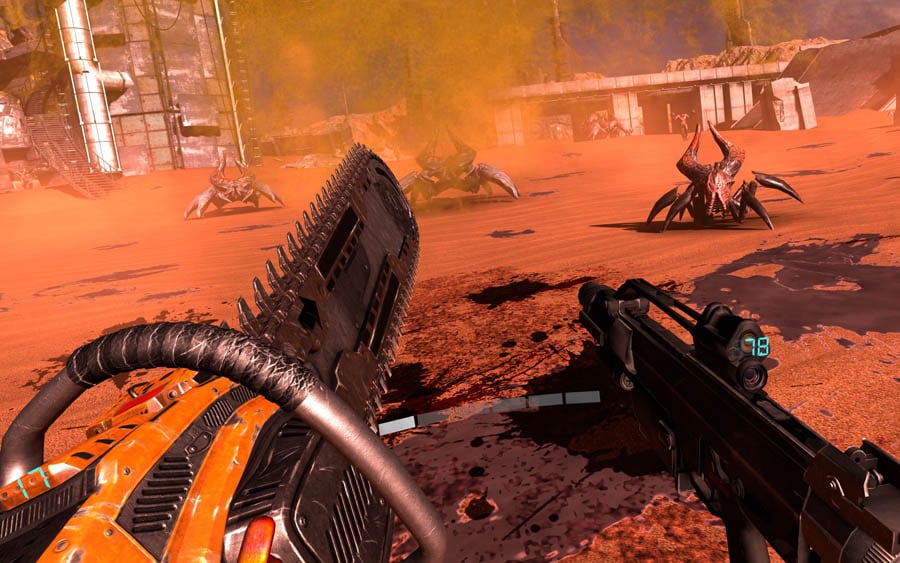
AMD LiquidVR™ MultiView Rendering in Serious Sam VR
Croteam’s Karlo Jez writes about AMD LiquidVR MultiView Rendering in Serious Sam VR with the GPU Services (AGS) Library.