Using the Visual Studio® Code Extension for RGA

This is a Visual Studio® Code extension for the Radeon GPU Analyzer (RGA). By installing this extension, it is possible to use RGA directly from within Visual Studio Code. RGA supports multiple modes, but the focus for this article is on Microsoft® DirectX® 12.

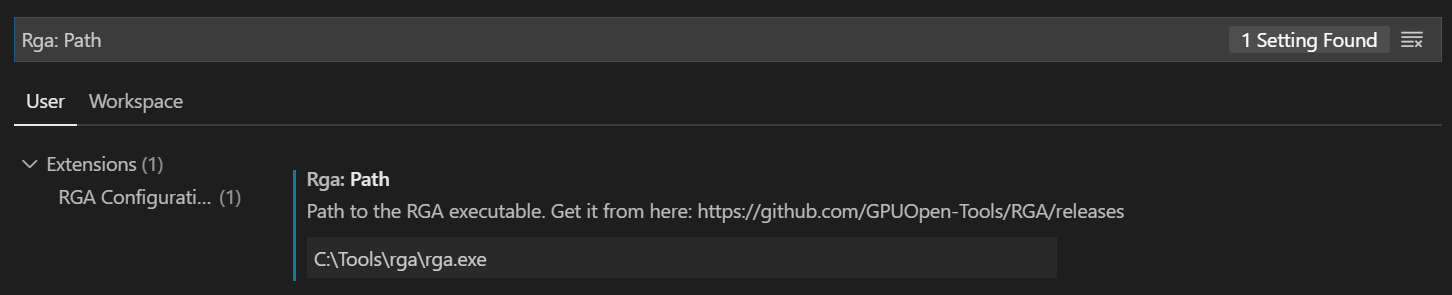
Previously, it was only possible to use RGA for DX12 compute and graphics through the command line interface. The RGA Visual Studio Code extension makes life easier by providing a GUI front end for the tool, and puts together a command used to call RGA from the command line. Therefore, it is necessary to download RGA separately and set the path to rga.exe in the extension settings from within Visual Studio Code.

Installation

  1. Obtain the latest version of RGA from GitHub here.
  2. Install the RGA Visual Studio Code Extension from the VS Code Marketplace here.
  3. Open VS Code settings (‘File->Preferences->Settings’) and search for ‘Rga: Path’.
  4. Add the path to the installed rga.exe – for example: d:\tools\rga\rga.exe .
  5. The RGA extension is now ready to use.

Important note:

  • Ensure that path names do not contain any spaces. This includes both the RGA installation directory and any source files.

Usage

The following instructions explain how to compile a DX12 graphics pipeline for use on a Radeon RX 5700 XT as an example. The animated GIF below illustrates the steps. It may be necessary to click on the image to view the animation.

Preparation

  1. Open VS Code in a parent directory of the shader.
  2. Open the shader in VS Code.
  3. If you define the root signature in HLSL, make sure that the [RootSignature()] attribute appears just above your shader. For more information about how root signatures can be defined, see here.
  4. If you are compiling a graphics pipeline, make sure to have the gpso file available. This defines a subset of the D3D12 graphics pipeline, read more here. Note: it may be easier to copy the filename (including the path) to the clipboard.
  5. Select the vertex shader entry point of the pipeline. Only the function name is necessary.
  6. Press Alt (or use some other form of multi-select) while selecting the pixel shader entry point of your pipeline.

Build Configuration

  1. Open the command palette of VS Code with Ctrl+Shift+P.
  2. Enter the command Call RGA: DX12 .
  3. Choose the preferred target architecture. For Radeon RX 5700 XT this would be gfx1010. Call rga.exe directly to show the full list of supported ASICs.
  4. Select the shader type of the first entry point. In this case this would be vs for VSMain .
  5. Do the same for the second entry point, and so on.
  6. Choose the preferred shader profile from the drop down. For instance – 6_0 for Shader Model 6.0.
  7. Type in the path to the gpso file, or paste it from the clipboard, or choose from the list of recent paths.
  8. Type in any custom arguments. If the [RootSignature()] is defined in binary form, add the --rs-bin argument followed by the absolute path here. This is also the stage for adding any arbitrary command that RGA supports.
  9. If the shader compiles successfully, the resulting AMD IL and AMD GCN/RDNA ISA disassembly will open in separate views.

All output is redirected to the terminal. That means error messages can be checked there, as well as the constructed command used to call RGA.

The shader can be changed as required. Pressing F7 (default) will run the last command again.

Hints and Tips

RGA Options

Searching for ‘RGA’ under VS Code settings provides more options for customizing the behavior. Some of these options include:

  • Configuring the command string. For some users, it might be preferable to continuously override a single root signature binary file that resides under c:\vs_code\rs\rga.fx.rs instead of copying different paths to the clipboard.
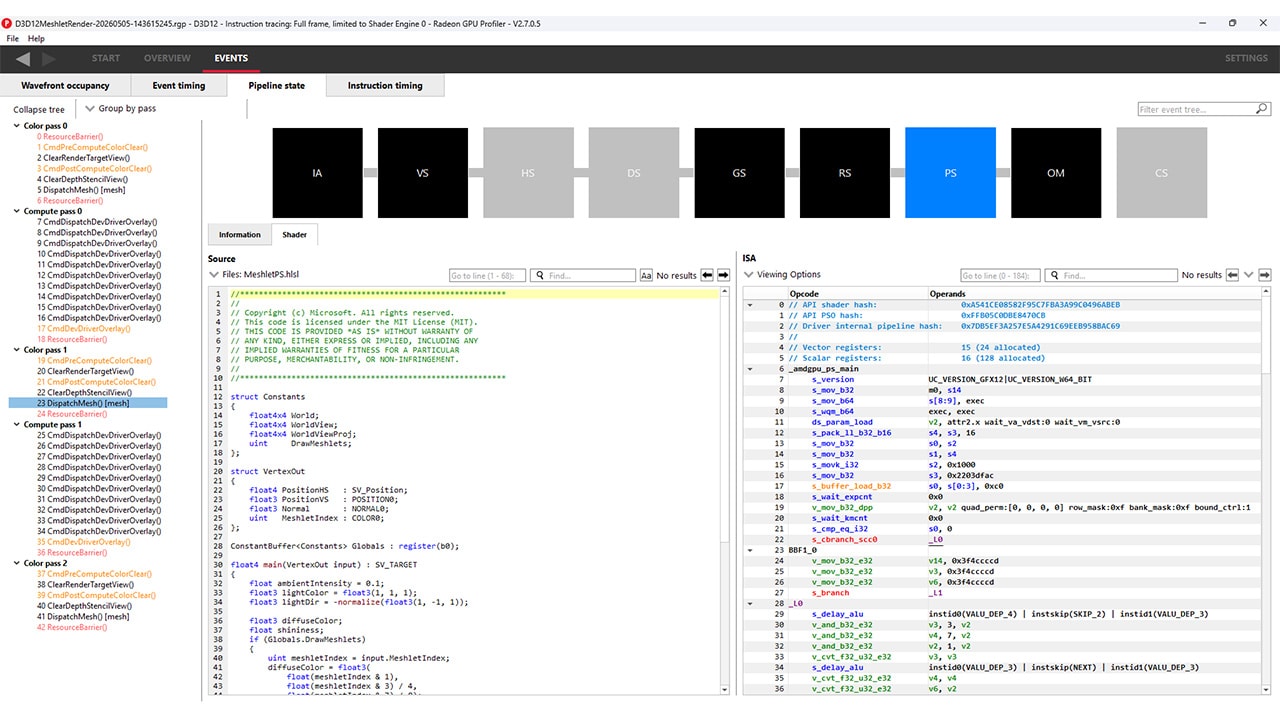
  • ‘Rga > View Column: Isa’ for controlling the editor column the ISA shows up in.
  • Syntax Highlighting

    To add syntax highlighting for “AMD GCN ISA” (also works for RDNA):

    1. Install the GCN VS Code extension from the marketplace.

2. Add a editor.tokenColorCustomizations field to your theme settings. Access this file ( settings.json ) by:

    • Go to the VS Code settings (‘File->Preferences->Settings’)
    • At the top right of the settings window, there are three icons. Select the left one highlighted in a circle here:

3. To separate the additional new entry from the previous entry (which may be the path setting) use a comma.

4. The code to add is as follows:

"editor.tokenColorCustomizations": {
    "textMateRules": [
            {
                "scope": "storage.type.amd-gcn-isa",
                "settings": {
                    "foreground": "#CC3333"
                }
            },
            {
                "scope": "keyword.vector.amd-gcn-isa",
                "settings": {
                    "foreground": "#33CCCC"
                }
            },
            {
                "scope": "keyword.scalar.amd-gcn-isa",
                "settings": {
                    "foreground": "#CC33CC"
                }
            },
            {
                "scope": "support.variable.vector.amd-gcn-isa",
                "settings": {
                    "foreground": "#CCCC33"
                }
            },
            {
                "scope": "support.variable.scalar.amd-gcn-isa",
                "settings": {
                    "foreground": "#6495ED"
                }
            },
            {
                "scope": "keyword.control.label.amd-gcn-isa",
                "settings": {
                    "foreground": "#33CC33"
                }
            }
        ]
    }

Related tools

RGA

Radeon™ GPU Analyzer

Radeon GPU Analyzer is an offline compiler and performance analysis tool for DirectX®, Vulkan®, SPIR-V™, OpenGL® and OpenCL™.

Related tutorials

Rosanna Ashworth-Jones

Rosanna Ashworth-Jones

Rosanna Ashworth-Jones is the GPUOpen Site Admin and Developer Engagement Manager, and a part of the European Game Engineering team. Links to third party sites, and references to third party trademarks, are provided for convenience and illustrative purposes only. Unless explicitly stated, AMD is not responsible for the contents of such links, and no third party endorsement of AMD or any of its products is implied.

Enjoy this blog post? If you found it useful, why not share it with other game developers?

You may also like...

Getting started: our software

New or fairly new to AMD’s tools, libraries, and effects? This is the best place to get started on GPUOpen!

Getting started: development and performance

Looking for tips on getting started with developing and/or optimizing your game, whether on AMD hardware or generally? We’ve got you covered!

If slide decks are what you’re after, you’ll find 100+ of our finest presentations here. Plus there’s a handy list of our product manuals!

Developer guides

Browse our developer guides, and find valuable advice on developing with AMD hardware, ray tracing, Vulkan, DirectX, UE4, and lots more.

Words not enough? How about pictures? How about moving pictures? We have some amazing videos to share with you!

The home of great performance and optimization advice for AMD RDNA™ 2 GPUs, AMD Ryzen™ CPUs, and so much more.

Product Blogs

Our handy product blogs will help you make good use of our tools, SDKs, and effects, as well as sharing the latest features with new releases.

Publications

Discover our published publications.