Settings
The settings tab is used to control global settings throughout the product. These settings are stored, and are persistent for all instances of RRA.
General
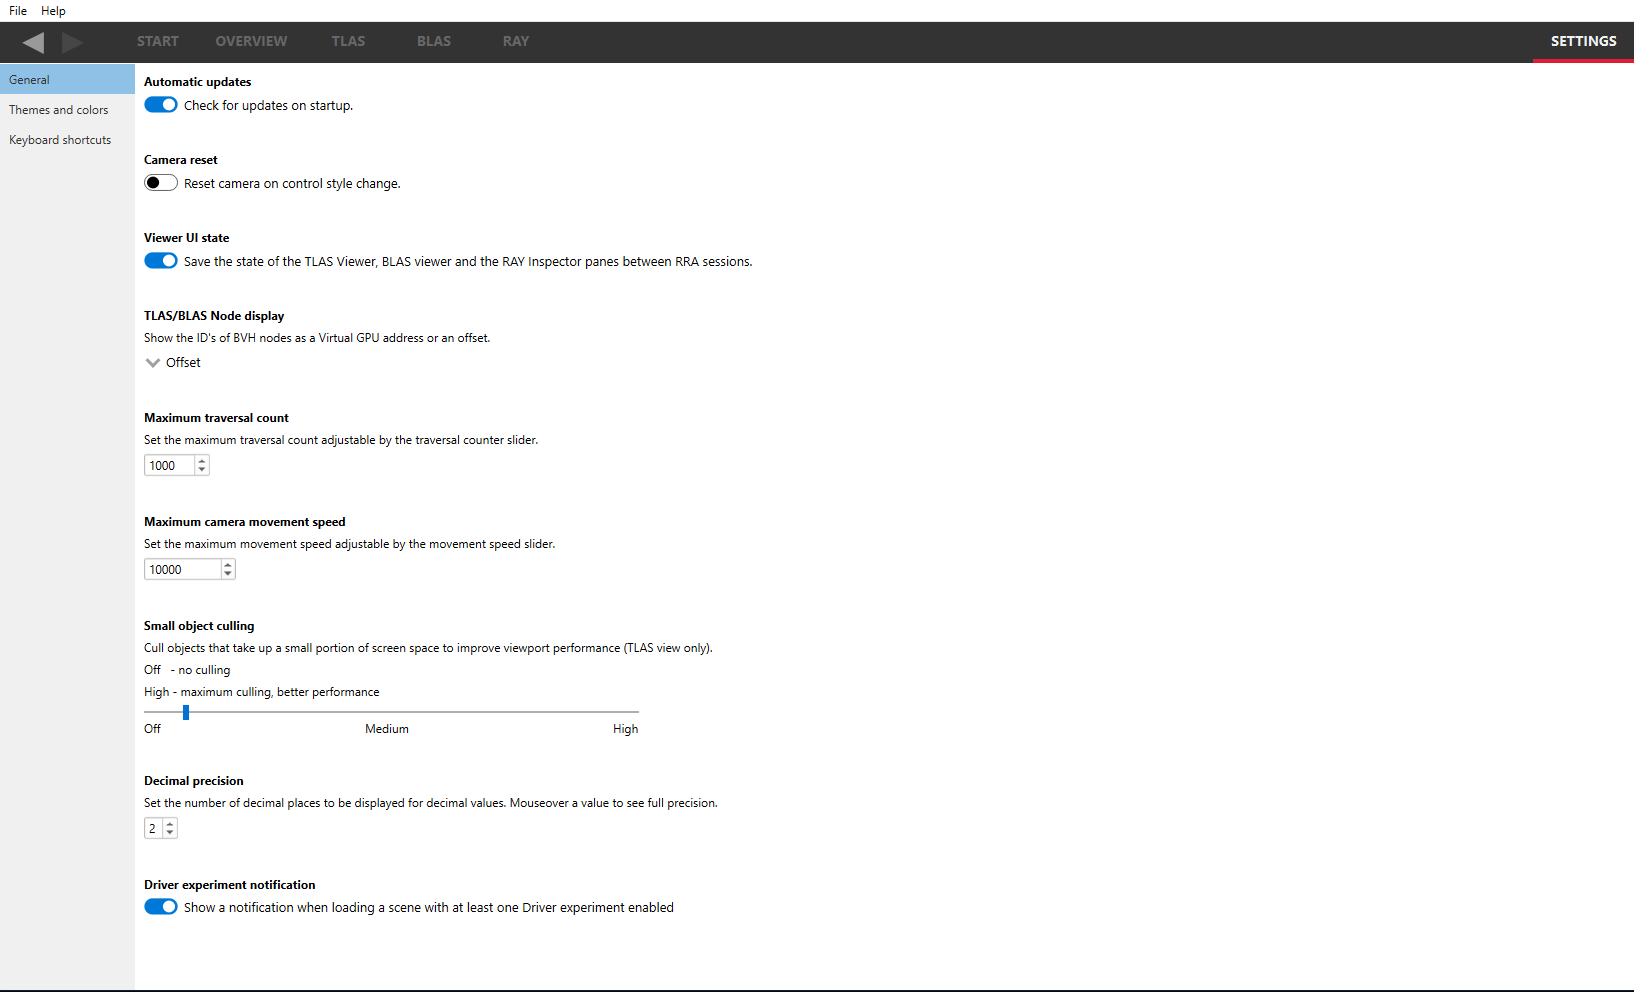
Check for updates If checked, the Radeon Raytracing Analyzer will alert you that a new version is available for download.
Camera reset If checked, the camera will reset to the starting position and orientation each time the camera’s control style is changed.
Viewer UI state If checked, certain elements of the viewer UI’s are persistent between RRA sessions. These are typically selections that are seldom changed. The following UI elements are shared between all viewers:
-
Culling mode
-
Up axis
-
Invert vertical
-
Invert horizontal
-
Continuous update
-
Projection mode
The following UI elements are saved per-view:
-
Control style
-
BVH coloring mode
-
Geometry coloring mode
-
Heatmap coloring mode
-
Traversal counter coloring mode
-
Rendering mode
-
Show geometry checkbox
-
Show axis-aligned BVH checkbox
-
Show instance transform checkbox (TLAS viewer only)
-
Show wireframe checkbox
-
Accept first hit checkbox
-
Cull back-facing triangles
-
Cull front-facing triangles
Automatic updates Check for updates to Radeon Raytracing Analyzer when starting the program.
Camera reset If enabled, the camera will reset position when the camera control style is changed.
Viewer UI state If enabled, the state of the TLAS, BLAS and RAY inspector panes will be remembered from the last session. Otherwise they will be reset to default settings. Some state, like camera movement speed, will not be remembered in either case.
TLAS/BLAS Node display Will allow the choice between showing the nodes in the treeviews on the viewer panes either by their GPU address, or by an offset.
Maximum traversal count Is used to set the maximum value of the traversal counter slider. The value can be lowered in the case where the scene has low counter values which will increase the resolution of the slider, or raised in the case where the traversal count of the scene exceeds the default value.
Maximum camera movement speed Sets the maximum speed of the camera when navigating around the scene. The speed is altered using a slider on the viewer panes. The default maximum speed is optimal in most cases but for very large scenes, it may be useful to increase this value.
Small object culling Objects which take small amounts of screen space are culled for efficiency. Moving the slider closer to the high setting will result in more culling and better performance.
Decimal precision The number of decimal places that floating point values throughout the app will be displayed at. Hovering the mouse over a floating point value will display its full precision through a tooltip.
Show Driver experiment notifications If checked, the Radeon Raytracing Analyzer will display a notification banner under the main drop down menu of the user interface indicating when a scene contains modified Driver experiments.

Themes and colors
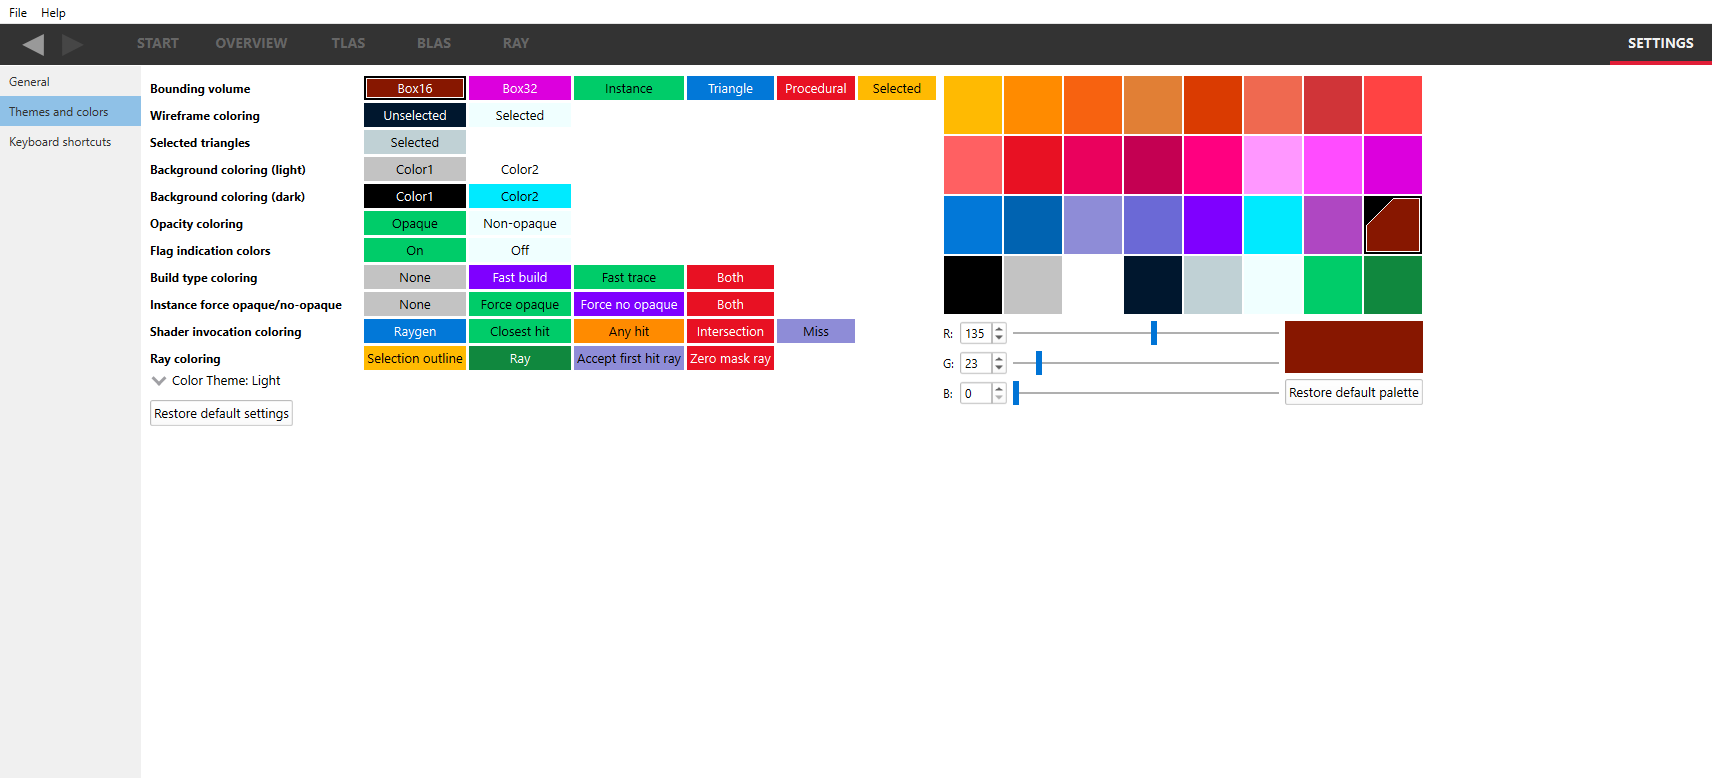
The Radeon Raytracing Analyzer makes heavy use of coloring to display its information. This pane allows users to thoroughly customize those colors. These include being able to specify how to color geometry based on different attributes and showing node types using different colors.
The Bounding volume refers to the colors used to show the bounding volume wireframe when the “Volume type” BVH coloring mode is selected (coloring modes are described later).
The Wireframe coloring colors are used when displaying the wireframe between each triangle.
The Selected triangles is the color used in the BLAS view to show the currently selected triangle nodes. Note that the selected triangle color is only available in the geometry rendering mode.
The Background coloring refers to the 2 colors that are used to paint the viewer background. By default, it consists of a checkerboard. Making the 2 colors the same will result in a single solid color.
The Opacity coloring is used for the Opacity geometry coloring mode.
The Flag indication colors are the 2 colors used for the build flag geometry coloring modes, indicating if the build flag is enabled or disabled.
The Build type coloring combines the FastBuild and FastTrace flags. These colors are used for the fast build/trace geometry coloring mode. Specifying both build flags is improper API usage, but coloring it allows the user to spot potential errors.
The Instance force opaque/no-opaque combines the ForceOpaque and ForceNoOpaque flags. These colors are used for the opacity geometry coloring mode. Specifying both build flags is improper API usage, but coloring it allows the user to spot potential errors.
The Shader invocation coloring determines the colors of the ray tracing shaders shown in the donut chart on the Overview pane.
The Ray coloring determines the colors of the rays shown in the 3D view of the Ray inspector.

Color theme: The color theme can be changed with the “Color Theme” drop down combo box. This changes the application-wide background and text color. The “Light” option maintains RRA’s default look of white backgrounds with black text. The “Dark” option changes RRA to have a dark background color with lighter color text. The “Detect OS” option uses the system’s color theme to determine whether the color theme should be light or dark. If the system’s color theme cannot be detected, RRA will default to light theme. If the system’s color theme is changed while RRA is open with the “Detect OS” option selected it will not apply until the application has been restarted. On Windows operating systems when changing the color theme a pop-up prompt will recommend restarting the application. This is because not all parts of RRA will update to a change in color theme until the application is restarted. Changing the color theme will not change any other color customization options that have been selected.

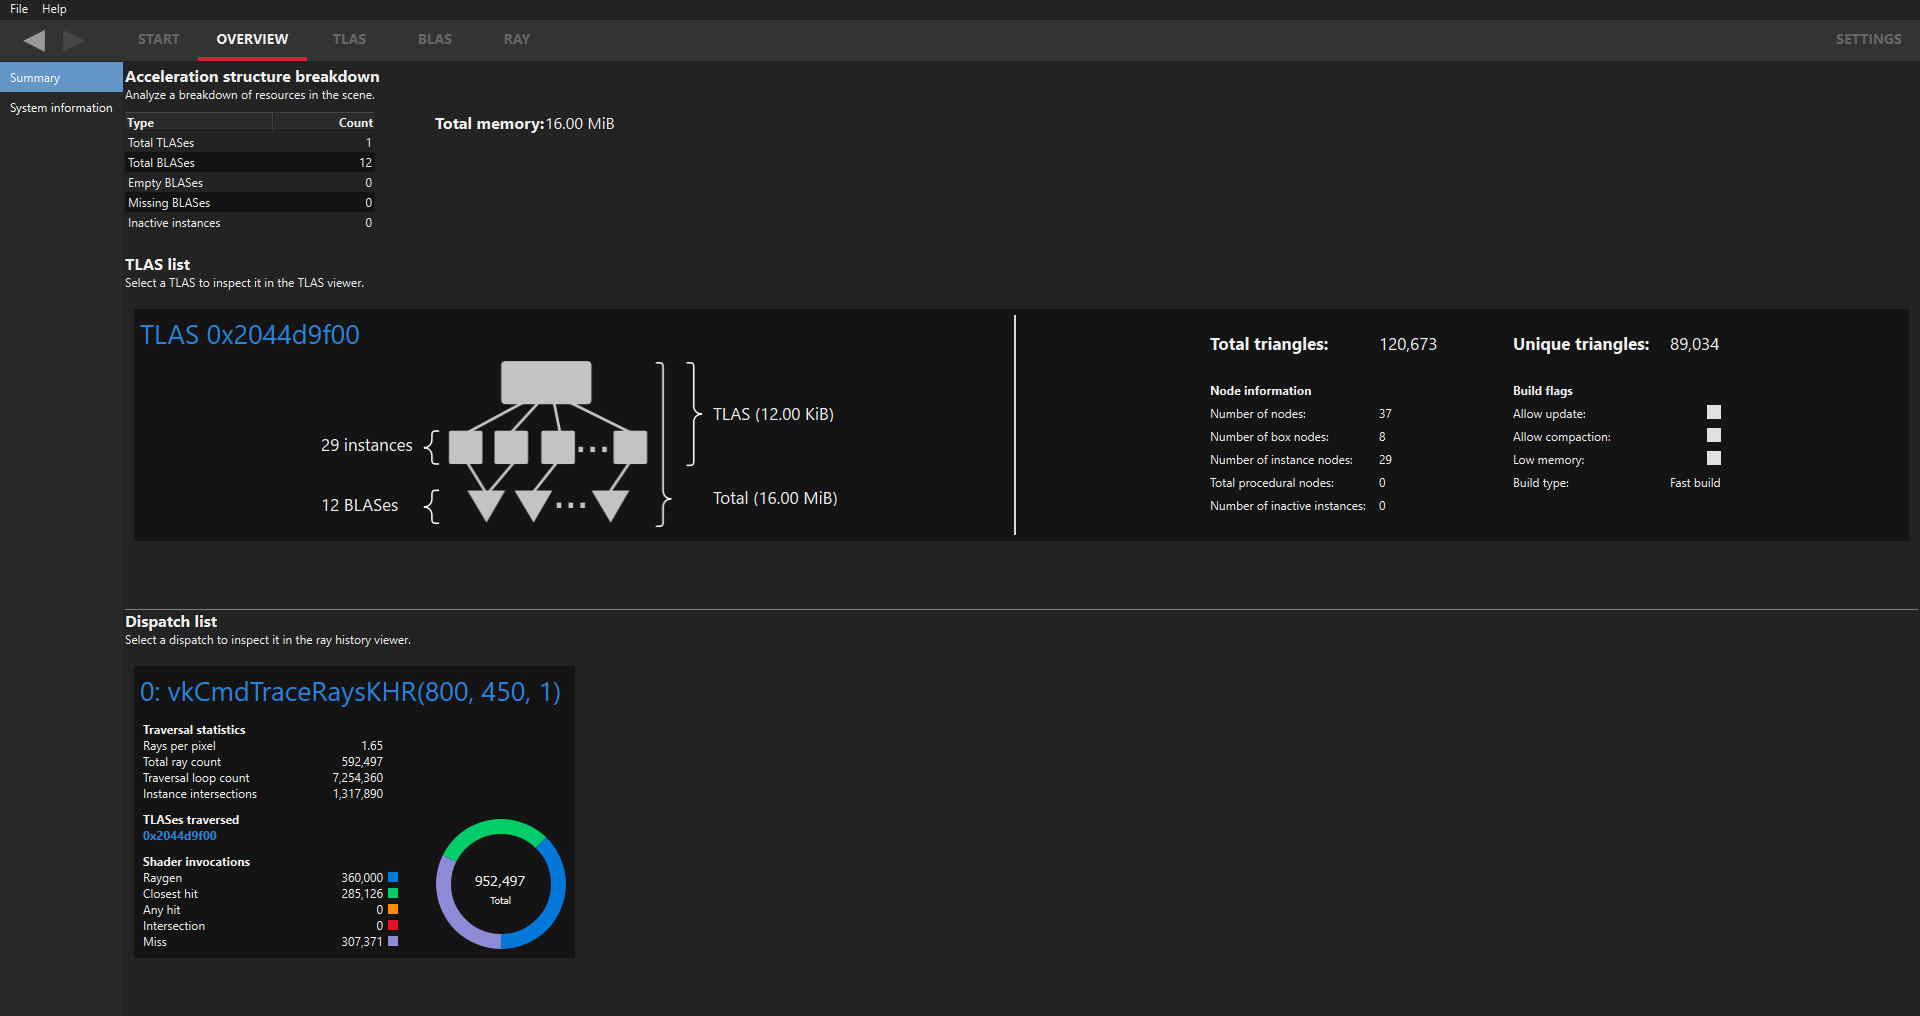
This is an example of how RRA will look when the color theme is changed to dark:

Keyboard shortcuts
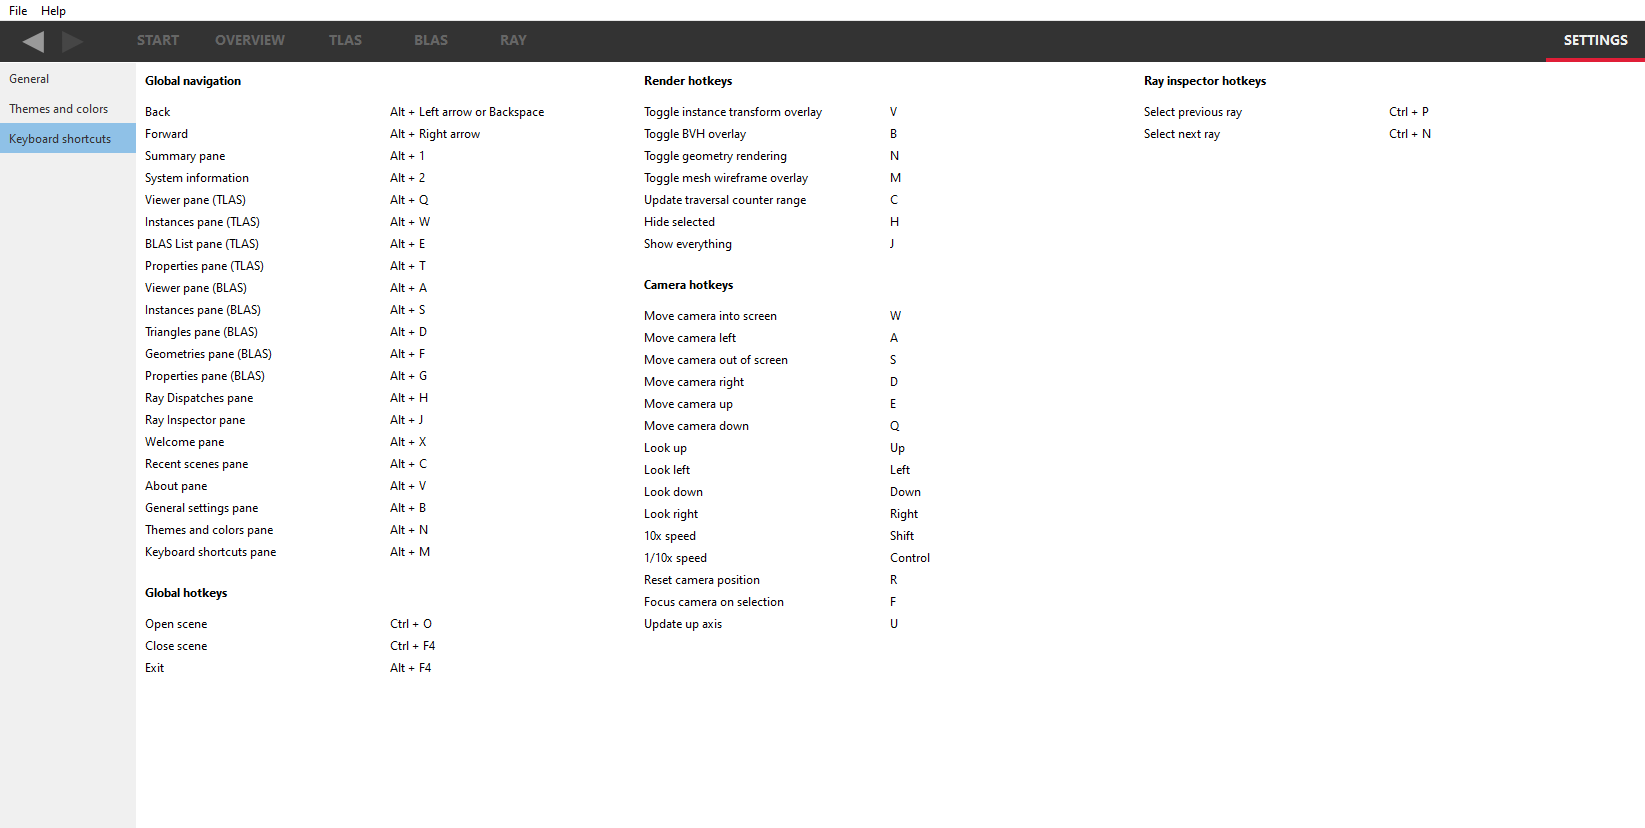
Here users will find the Keyboard shortcuts pane:
The Global navigation section refers to keystrokes that aid user navigation, and are always detected regardless of which pane is visible.
The Camera hotkeys shortcuts are specific to moving and panning operations that can be performed with the camera (see below).
The Render hotkeys shortcuts enable certain rendering operations to be toggled, such as wireframe rendering.
The Global hotkeys section refers to any hotkeys available anywhere in the product.

All users are encouraged to adopt these keystrokes while using RRA.
UI Navigation
In an effort to improve workflow, RRA supports keyboard shortcuts and back and forward history to quickly navigate throughout the UI.
Back and forward navigation
RRA tracks navigation history, which allows users to navigate back and forward between all of RRA’s panes. This is achieved using global navigation hotkeys shown above, or the back and forward buttons on all panes in the top left below the file menu.
Currently, back and forward navigation is restricted to pane switches.