Known Issues
Cleanup After a RadeonDeveloperServiceCLI Crash
If the RadeonDeveloperServiceCLI executable crashes on Linux, shared memory may need to be cleaned up by running the remove_shared_memory.sh script located in the script folder of the RGP release kit. Run the script with elevated privileges using sudo. If this fails to work, try starting the panel with elevated privileges.
Windows Firewall Blocking Incoming Connections
-
Deleting the settings file. If problems arise with connection or application histories, these can be resolved by deleting the Radeon Developer Panel’s settings file at: “C:\Users\your_name\AppData\Roaming\RadeonDeveloperPanel\settings.ini”
on Windows. On Linux, the corresponding file is located at:
“~/.local/share/RadeonDeveloperPanel/settings.ini”
-
“Connection Failure” error message. This issue is sometimes seen when running the panel for the very first time. The panel tries to start the service automatically for local connections and this can fail. If you see this message try manually starting the “RadeonDeveloperService(.exe)” and connect again.
-
Remote connection attempts timing out. When running the Radeon Developer Service on Windows, the Windows Firewall may attempt to block incoming connection attempts from other machines. The best methods of ensuring that remote connections are established correctly are:
-
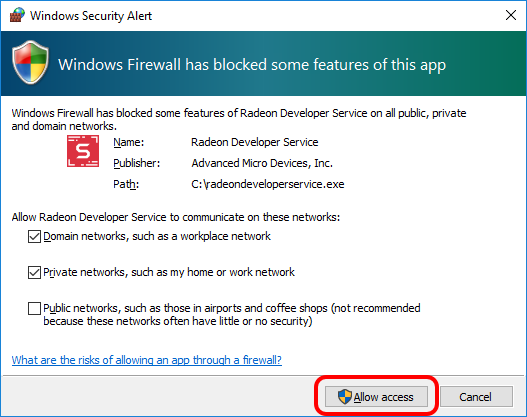
Allow the RDS firewall exception to be created within the Windows Firewall when RDS is first started. Within the Windows Security Alert popup, enable the checkboxes that apply for your network configuration, and click “Allow access”.
-
-
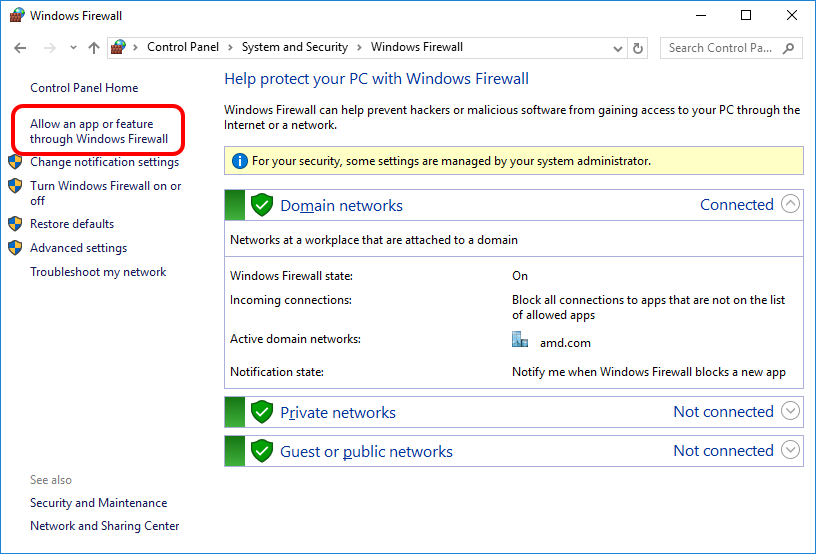
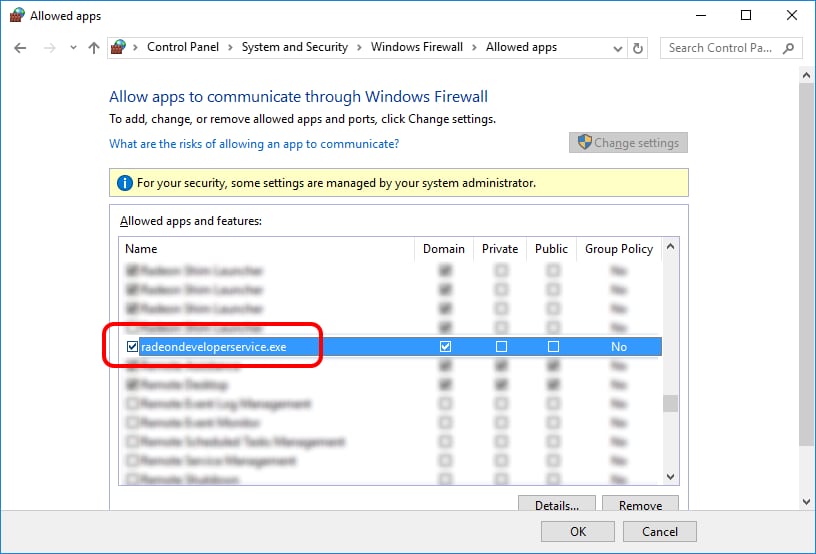
If “Cancel” was previously clicked in the above step during the first run, the exception for RDS can still be enabled by allowing it within the Windows Control Panel firewall settings. Navigate to the “Allow an app or feature” section, and ensure that the checkbox next to the RadeonDeveloperService(.exe) entry is checked:
-
Alternatively, disable the Windows Firewall entirely will also allow RDS to be connected to.
Note
The Windows firewall alert in no way indicates that the Radeon Developer tools are trying to communicate to an AMD server over the internet. The Radeon Developer tools do not attempt to connect to a remote AMD server of any description and do not send personal or system information over remote connections. The Radeon Developer Panel needs to communicate with the Radeon Developer Service, which may or may not be on the same machine, and a connection needs to be made between the two (normally via a socket).
Disabling Linux Firewall
If the remote machine is running Linux and the “Connection Failure” error message is displayed, the Linux firewall may need to be disabled. This is done by typing “sudo ufw disable” in a terminal. The firewall can be re-enabled after capturing by typing “sudo ufw enable”.
Setting GPU clock modes on Linux
Adjusting the GPU clock mode on Linux is accomplished by writing to /sys/class/drm/card<n>/device/power_dpm_force_performance_level, where <n> is the index of the card in question. By default this file is only modifiable by root, so the application being profiled would have to be run as root in order for it to modify the clock mode. It is possible to modify the permissions for the file instead so that it can be written by unprivileged users. The Radeon Developer Tool Suite package includes the “scripts/setup.sh” script which when run as root will set the GPU clock mode. Execute this script before running the Radeon Developer Service and target application, and the GPU clock mode will be updated correctly at runtime.
Note
This script needs to be run each time you reboot your machine; the file permissions do not survive system reboots.
Enabling support for RMV tracing on Linux
RMV tracing on Linux requires specific kernel tracing features to be enabled. The scripts/setup.sh script file when run as root will setup the necessary kernel tracing components to support RMV capture. Please run this script prior to launching Radeon Developer Service or Radeon Developer Panel.
Radeon Developer Panel connection issues on Linux
The Radeon Developer Panel may fail to start the Radeon Developer Service when the Connect button is clicked. If this occurs, manually start the Radeon Developer Service, select localhost from the Recent connections list and click the Connect button again.
Missing Timing Data for DirectX 12 Applications
To collect complete profile datasets for DirectX 12 applications, two additional actions must be performed:
1) The user account in Windows needs to be associated with the “Performance Log Users” group.
2) The following REG_DWORD registry key must be set: HKEY_LOCAL_MACHINE\Software\AMD\RadeonTools\RgpEnableEtw=1
If these two privileges aren’t configured properly, profiles collected under the user’s account may not include all timing data for GPU Sync objects.
A batch file is provided to perform the above two actions (scripts\AddUserToGroup.bat). The batch file should be run as administrator (Right click on file and select “Run as Administrator”). The script’s output is shown below:
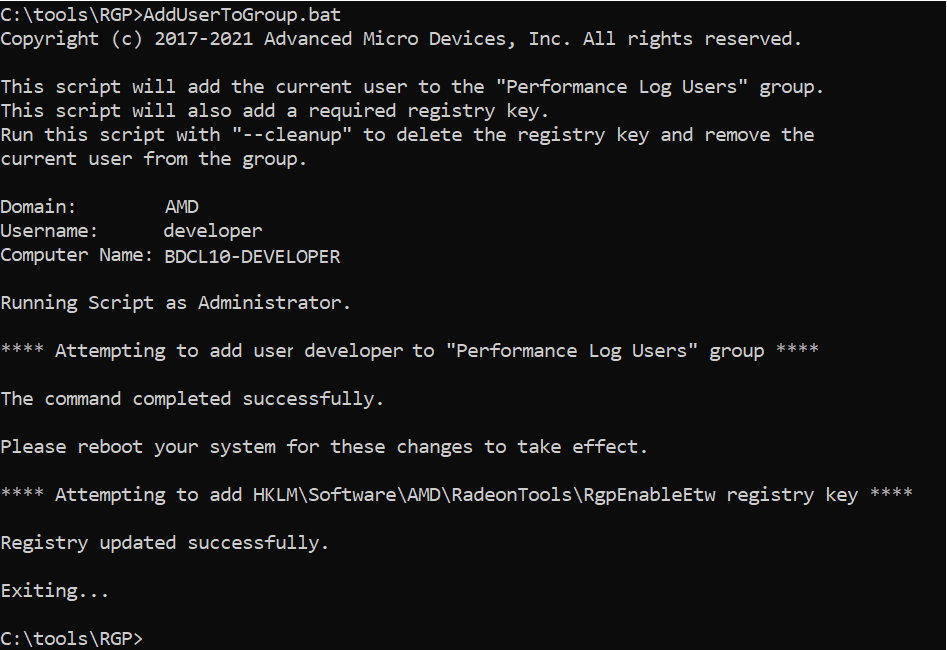
The actions performed by the batch fie can be undone by running the batch file with a -\-cleanup command line switch.
Alternatively, to manually add the active user to the proper group, follow these steps:
-
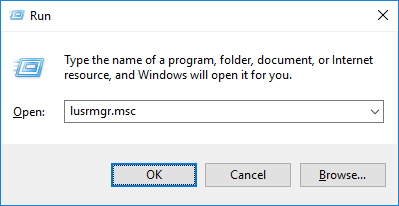
Open the Run dialog by using the Windows Start menu, or through the Windows + R shortcut.
-
Type “lusrmgr.msc” into the Run window, and click OK.
-
-
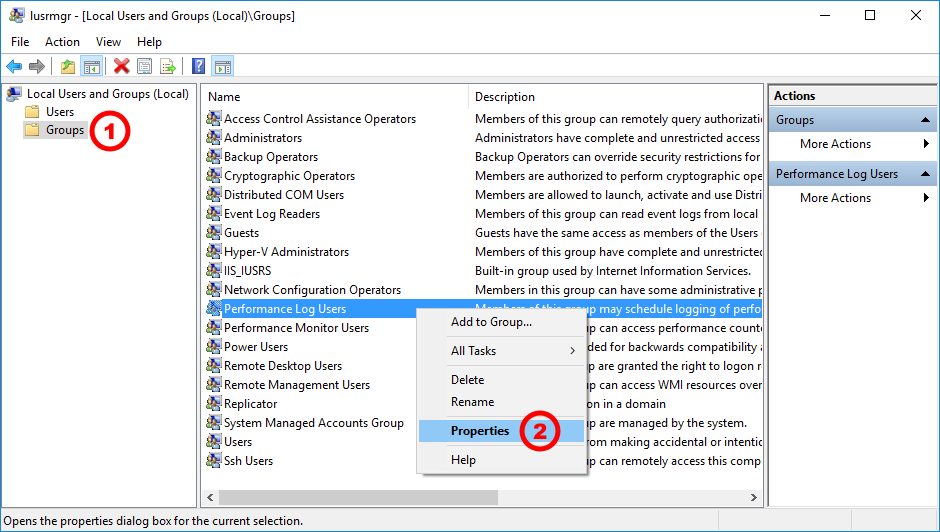
Within the “Local Users and Groups” configuration window that opens, select the Groups node.
-
Select the Performance Log Users entry. Right-click and select Properties.
-
-
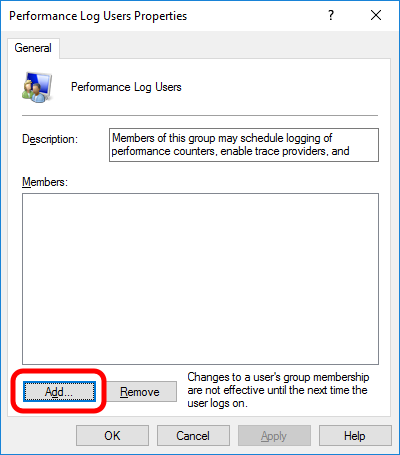
To add the active user to the group, click the Add… button. (If the active user appears within this list, the account is already configured properly.)
-
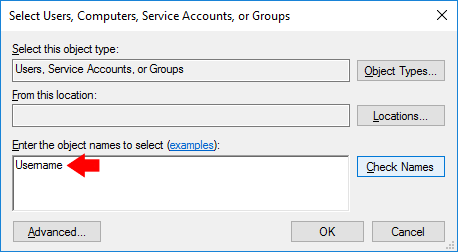
Type the active user’s account name into the Select Users, Computers, Service Accounts, or Groups dialog, and click OK.
-
When the user has been added to the group, restart the machine and log back in. RDS should now be configured to collect full timing information for DirectX 12 applications.
Radeon Developer Service Port numbers
Note
When running both the Radeon Developer Panel and the Radeon Developer Service on the same system the communication between the two uses pipes, not sockets and ports, so setting the port has no effect. In this scenario, it is possible to set the service to listen on a non-default port. Leave the panel on the default port, and connecting will work fine.
Problems caused by existing installation of RADV Linux Vulkan driver
Installations of Ubuntu 20.04 or newer may have the RADV open source Vulkan driver installed by default on the system. As a result, after an amdgpu-pro driver install, the default Vulkan ICD may be the RADV ICD.
In order to capture a profile, Vulkan applications must be using the amdgpu-pro Vulkan ICD. The default Vulkan ICD can be overridden by setting the following environment variable before launching a Vulkan application: VK_ICD_FILENAMES=/etc/vulkan/icd.d/amd_icd64.json
Problems caused by the presence of non-AMD GPUs and non-AMD CPUs with integrated graphics
The presence of non-AMD GPU’s and CPU’s on your system can cause the failure to generate a profile or apps to not run at all.
These problems typically occur with Vulkan apps in systems that have:
-
A non-AMD CPU with in integrated non-AMD GPU
-
A non-AMD discrete GPU
Vulkan applications, by default, use GPU 0 which usually maps to the integrated GPU, or in some cases, the non-AMD discrete GPU. In both cases Vulkan apps will either fail to run, or RGP profiling will not work (no RGP overlay will be present in these cases).
To avoid these issues:
-
Disable any non-AMD integrated GPU’s in the device manager
-
Disable any non-AMD discrete GPU’s in the device manager, and/or physically remove from the system.


