Example 1: Maze Solver

This guide walks you through creating a maze environment and training an agent to navigate it using reinforcement learning in Unreal Engine.

../_images/maze_solver.gif

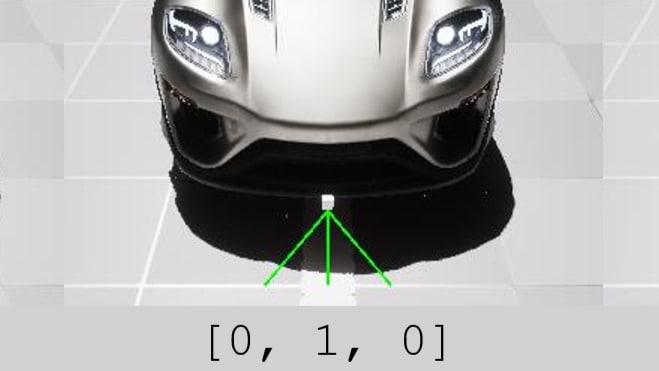
In this example, we will create a static maze with a single agent that learns to navigate from the starting location (on the right side) to the goal location (on the left side) using reinforcement learning. The agent interacts with the environment by collecting observations through sensors and performing actions through actuators. In this example, our agent will observe the walls around it using raycasts and move in the x and y directions.

We will train our agent by having it repeatedly try to solve the maze. Each attempt at the maze is referred to as an episode and ends when the agent successfully exits the maze, or runs out of time.

Periodically, the agent will review its performance during previous episodes and then update its policy to improve further. To quantify the performance of the agent we define a function that rewards the agent at each step of training. For this example, being away from the goal incurs a small penalty, hitting a wall incurs a medium penalty, and completing the maze results in a large reward. In this way the agent will learn a policy that maximizes the total reward received during each episode. The agent can then use the learned policy during gameplay to decide which actions to take.

The Structure of the Environment in Unreal Engine

To build the game (called environment hereafter) where the agent will learn to solve the maze, we need the following in our Unreal Engine project:

Initial Setup

  1. Create a new blank project with a desired name and location.

  2. Install the Schola plugin to the project using the Getting Started with Schola guide.

  3. Go to EditProject Settings, and scroll down to find Schola.

    Note

    If you don’t see Schola in the Project Settings, please check whether Schola is installed in EditPlugins Menu. Please refer to the Getting Started with Schola guide for more information.

    ../_images/plugin_menu.png

  4. For Gym Connector Class, select Python Gym Connector

../_images/create_blank_project.png
../_images/schola_setting.png

Creating the Map

  1. Create a wall blueprint class with collision enabled.

  2. Create a maze by arranging walls in the map scene.

  3. Optionally, add a finish line at the maze exit to visually mark the goal.

  4. Save the map as mazeMap.

../_images/maze_map.png

Creating the Agent

  1. Create a new Blueprint Class with parent class Character, and name it MazeSolverAgent.

  2. Add any desired static mesh as the agent’s body, and optionally select a good-looking material.

  3. Save and close the blueprint, and place a MazeSolverAgent at the starting location in the map.

  4. Check whether the location of the MazeSolverAgent has x=0. If not, move the entire maze with the agent to ensure the starting location has x=0.

Setting up Observation Collection

Sensor objects are components that can be added to the agent or the BlueprintTrainer. They can contain an Observer object. It informs the agent of the distances of the surrounding physical objects. The agent has one Sensor, containing the Ray Cast Observer. The observation from each ray includes whether the ray hits an object, and the distance of this object.

Note

Observer objects can be attached in three ways:

  1. Attaching a Sensor component to the agent, which can contain an Observer object.

  2. Attaching a Sensor component to the BlueprintTrainer, which can contain an Observer object.

  3. Adding directly in the Observers arrays in the BlueprintTrainer.

../_images/maze_solver_sensor.png

  1. Open the MazeSolverAgent class in the blueprint editor.

  2. Add a Sensor component.

  3. In DetailsSensorObserver, select Ray Cast Observer.

  4. In DetailsSensorObserverSensor propertiesNumRays, enter 8.

  5. In DetailsSensorObserverSensor propertiesRayDegrees, enter 360.

  6. In DetailsSensorObserverSensor properties, check the DrawDebugLines box.

Setting up Actuators

ActuatorComponent can be added to the agent or the BlueprintTrainer. They can contain an Actuator object. The agent has one Actuator, the Movement Input Actuator. It allows the agent to move in different directions. In this tutorial, we will limit the agent to only move in the x and y direction.

Note

Actuator objects can be attached in three ways:

  1. Attaching an ActuatorComponent to the agent, which can contain an Actuator object.

  2. Attaching an ActuatorComponent component to the BlueprintTrainer, which can contain an Actuator object.

  3. Adding directly in the Actuators arrays in the BlueprintTrainer.

../_images/maze_solver_actuator.png

  1. Open the MazeSolverAgent class in the blueprint editor.

  2. Add an Actuator component.

  3. In DetailsActuator ComponentActuator, select Movement Input Actuator.

  4. In DetailsActuator ComponentActuatorActuator Settings, uncheck HasZDimension.

  5. In DetailsActuator ComponentActuatorActuator Settings, set Minspeed to -10.

  6. In DetailsActuator ComponentActuatorActuator Settings, set MaxSpeed to 10.

Creating the Trainer

To train an agent in Schola, the agent must be controlled by an AbstractTrainer, which defines the ComputeReward() and ComputeStatus() functions. In this tutorial, we will be creating an BlueprintTrainer (subclass of AbstractTrainer).

  1. Create a new Blueprint Class with parent class BlueprintTrainer, and name it MazeSolverTrainer.

  2. Add a new boolean variable. Name it hasHit. This variable will store whether the agent has hit a wall in the current step.

  3. Set the Event Graph as shown below. This binds an On Actor Hit event to our agent, allowing the reward function to detect when the agent hits a wall.


MazeSolverTrainer > Event Graph Fallback Image


Define the Reward Function

In this tutorial, we use a per-step reward for getting closer to the goalpost and one big reward for reaching the goalpost. Additionally, we give a penalty if the agent hits the wall. The per-step reward is computed as -abs(agentPositionX - goalpostPositionX) / envSize - hasHitWall if the agent has not reached the goalpost, and 10 if the agent has reached the goalpost.

  1. Add a new float variable. Name it goalpostPositionX. This variable will store the X-position of the goal post.

    1. Return to the map, and get the X-position of the end of the maze.

    2. Return to the MazeSolverTrainer class, and set the default value of goalpostPositionX to this number.

  2. Add a new float variable. Name it envSize. This variable will the width of the maze.

    1. Return to the map, and get the width the maze.

    2. Return to the MazeSolverTrainer class, and set the default value of envSize to this number.

  3. Add a new local boolean variable in ComputeReward(). Name it CachedHasHit. This is used to temporarily store the value of hasHit so we can reset it during ComputeReward().

  4. Set the ComputeReward() function as shown below.


MazeSolverTrainer > ComputeReward Fallback Image


Define the Status Function

There are three possible statuses for each time step:

  1. Running: The episode is still ongoing, and the agent continues interacting with the environment.

  2. Completed: The agent has successfully reached a terminal state, completing the episode.

  3. Truncated: The episode has been forcefully ended, often due to external limits like time steps or manual intervention, without reaching the terminal state.

In this tutorial, the terminal state for the agent is reaching the maze exit, which we track by determining if the MazeSolverAgent has X-position >= goalpostPositionX Thus, an episode is completed when the agent goes over the goalpostPositionX. We also set a max step to prevent an episode from running indefinitely.

  1. Add a new integer variable. Name it maxStep, and set the default value to 5000. This means an episode is truncated if it reaches 5000 time steps without completing. You may adjust this number if you want to allow longer or shorter episodes due to factors such as the size of the environment or the speed of the agent.

  2. Set the ComputeStatus() as shown below.


MazeSolverTrainer > ComputeStatus Fallback Image


Note

The Step variable is a part of the BlueprintTrainer and it tracks the current number of steps since the last ResetEnvironment() call.

Creating the Environment Definition

To train an agent in Schola, the game must have an AbstractScholaEnvironment Unreal object, which contains the agent and logic for initializing or resetting the game environment. In this tutorial, we will be creating an Blueprint Environment (subclass of AbstractScholaEnvironment) as the Environment. The InitializeEnvironment() function is called at the start of the game, and sets the initial state of the environment. In this tutorial, we save the initial location of the agent and Set Global Time Dilation, which scales the time for all objects in the map to be 10x faster. This allows the agent to meaningfully explore more space during training, preventing the model from getting stuck at a local minimum, and decreasing training time. The ResetEnvironment() function is called before every new episode. In this tutorial, we just reset the agent to its initial location.

  1. Create a new Blueprint Class with parent class BlueprintScholaEnvironment, and name it MazeSolverEnvironment.

  2. Add a new variable named agentArray of type Pawn (Object Reference) array. This variable keeps track of registered agents belonging to this environment definition.

    1. Make this variable publicly editable (by clicking on the eye icon to toggle the visibility).

  3. Add a new variable named agentInitialLocation of type Transform. This variable is for storing the initial location of the agent, so it can be restored upon reset.

  4. Set the Event Graph and RegisterAgents() function as shown below.

  5. Save and close the blueprint, and place a MazeSolverEnvironment anywhere in the map. The location does not matter.


MazeSolverEnvironment > Event Graph Fallback Image


MazeSolverEnvironment > RegisterAgents Fallback Image


Registering the Agent

  1. Click on the MazeSolverEnvironment in the map.

    1. Go to Details panelDefaultAgent Array.

    2. Add a new element.

    3. Select MazeSolverAgent in the drop-down menu.

      ../_images/maze_solver_environment_include_pawn.png

  2. Open the MazeSolverAgent class in the blueprint editor.

    1. Go to Details Panel.

    2. Search for AIController.

    3. In the drop-down, select MazeSolverTrainer .

      ../_images/maze_solver_aicontroller.png

Starting Training

We will train the agent using the Proximal Policy Optimization (PPO) algorithm for 500,000 steps. The following two methods run the same training. Running from the terminal may be more convenient for hyperparameter tuning, while running from the Unreal Editor may be more convenient when editing the game.

  1. Run the game in Unreal Engine (by clicking the green triangle).

  2. Open a terminal or command prompt, and run the following Python script:

Copied!

schola-sb3 -p 8000 -t 500000 PPO

Enabling TensorBoard

TensorBoard is a visualization tool provided by TensorFlow that allows you to track and visualize metrics such as loss and reward during training.

Add the --enable-tensorboard flag to the command to enable TensorBoard. The --log-dir flag sets the directory where the logs are saved.

Copied!

schola-sb3 -p 8000 -t 500000 --enable-tensorboard --log-dir experiment_maze_solver PPO

After training, you can view the training progress in TensorBoard by running the following command in the terminal or command prompt. Make sure to first install TensorBoard, and set the --logdir to the directory where the logs are saved.

Copied!

tensorboard --logdir experiment_maze_solver/PPO_1

Note

Logs for subsequent runs will be in PPO_2, PPO_3, etc.

../_images/maze_solver_tensorbard.png

Next Steps

Congratulations! You have trained your first Schola agent! From here, you can try the following:

  1. Modify the reward to be only sparse rewards, and see how the agent performs after retrain.

  2. Add more sensors to the agent or modify the RayCastObserver parameters, and see how the agent performs after retrain.

  3. Change the initial location of the agent for every episode, and see how the agent performs after retrain.

  4. Advanced: dynamically change the maze shape (same size or different sizes) for every episode, and try to train the agent to solve all kinds of mazes.

Related pages

  • Visit the Schola product page for download links and more information.

Looking for more documentation on GPUOpen?

AMD GPUOpen software blogs

Our handy software release blogs will help you make good use of our tools, SDKs, and effects, as well as sharing the latest features with new releases.

GPUOpen Manuals

Don’t miss our manual documentation! And if slide decks are what you’re after, you’ll find 100+ of our finest presentations here.

AMD GPUOpen Performance Guides

The home of great performance and optimization advice for AMD RDNA™ 2 GPUs, AMD Ryzen™ CPUs, and so much more.

Getting started: AMD GPUOpen software

New or fairly new to AMD’s tools, libraries, and effects? This is the best place to get started on GPUOpen!

AMD GPUOpen Getting Started Development and Performance

Looking for tips on getting started with developing and/or optimizing your game, whether on AMD hardware or generally? We’ve got you covered!

AMD GPUOpen Technical blogs

Browse our technical blogs, and find valuable advice on developing with AMD hardware, ray tracing, Vulkan®, DirectX®, Unreal Engine, and lots more.

Find out more about our software!

AMD GPUOpen Effects - AMD FidelityFX technologies

Create wonder. No black boxes. Meet the AMD FidelityFX SDK!

AMD GPUOpen Samples

Browse all our useful samples. Perfect for when you’re needing to get started, want to integrate one of our libraries, and much more.

AMD GPUOpen developer SDKs

Discover what our SDK technologies can offer you. Query hardware or software, manage memory, create rendering applications or machine learning, and much more!

AMD GPUOpen Developer Tools

Analyze, Optimize, Profile, Benchmark. We provide you with the developer tools you need to make sure your game is the best it can be!