Building Tag

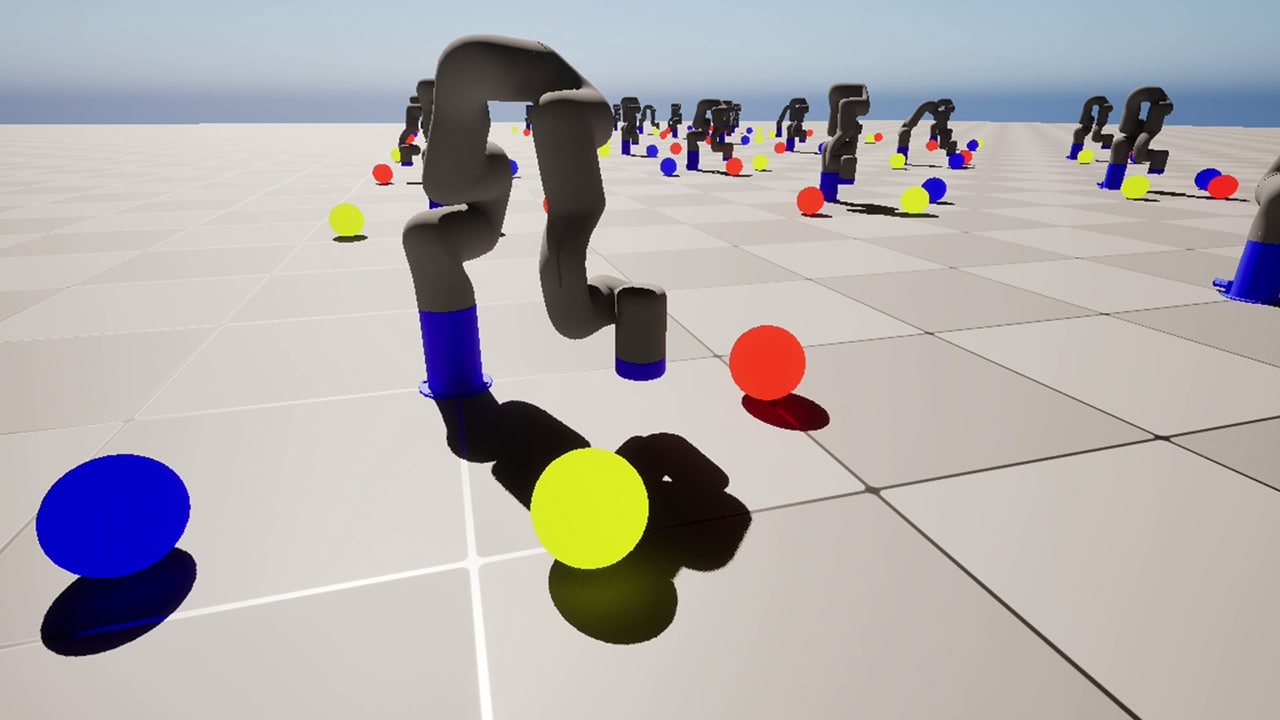
In this tutorial, we create a multi-agent environment where the agents are trained to play a 3v1 game of tag. Specifically, we create one runner agent which tries to avoid being caught and three tagger agents with the goal of catching the runner. The agents can move forward, left and right and can sense both their surrounding objects, as well as the locations of other agents.

../_images/Tag.gif

The Structure of the Environment in Unreal Engine

To build the game (called environment hereafter), we need to create the following in our Unreal Engine project:

Initial Setup

Please refer to the Schola Initial Setup section to set up the Unreal Engine project and Schola plugin.

Creating the Custom Direction and Distance Observer

There are a variety of built-in observer classes available in Schola, such as the RotationObserver and RayCastObserver. Custom observers are needed when we need specific observations not covered by the built-in observers. In this example, we will create a custom BlueprintBoxObserver (subclass of BoxObserver) to allow taggers to observe the direction and distance of other agents relative to the current agent in the game. It will return the distance normalized by the environment size and the direction as a unit vector. The GetObservationSpace() function will return the observation space, and the CollectObservations() function will collect and return the observations.

  1. Create a new Blueprint Class with parent class BlueprintBoxObserver, and name it DirectionDistanceObserver.

  2. Add a new integer variable. Name it EnvSize, and set the default value to 5000. This stores the maximum possible distance between two agents within the environment.

  3. Add a new Actor variable. Name it Target. This stores the target agent that the observer will track.

  4. Set the GetObservationSpace() and CollectObservations() blueprints as shown below.


Creating the Agent

Creating the Tagger Class

  1. Create a new Blueprint Class with parent class Character, and name it Tagger.

  2. Add any desired static meshes and material as the agent’s body.

  3. Set Details → Character Movement: Walking → Max Walk Speed to 520 cm/s.

  4. Set Details → Character Movement (Rotation Settings) → Orient Rotation to Movement to true. This allows the agent to rotate using the Movement Input Actuator.

  5. Set Details → Pawn → Use Controller Rotation Yaw to false. This allows the agent to rotate using the Movement Input Actuator.

  6. In Details → Tags, add a new tag, and set the value to Tagger. This tag is used by the RayCastObserver to detect different objects.

../_images/taggerSettings.png

Attaching the Ray Cast Observer

  1. Add a Sensor component.

  2. In Details → Sensor → Observer, select Ray Cast Observer.

  3. Set Details → Sensor → Observer → Sensor properties → NumRays to 36.

  4. Set Details → Sensor → Observer → Sensor properties → RayDegrees to 360.

  5. Set Details → Sensor → Observer → Sensor properties → RayLength to 2048.

  6. In Details → Sensor → Observer → Sensor properties → TrackedTags, add two new elements and set the tags to Tagger and Runner.

Note

For more information on attaching actuators and observers, please refer to the Attaching Actuators and Observers Section of Example 2.

Attaching the Movement Input Actuator

We will use two Movement Input Actuators to move the agent. One lateral axis actuator to steer, and one forward axis actuator to move the agent forward.

  1. Add an Actuator component, and name it ForwardAxisMovementInputActuator

  2. In Details → Actuator Component → Actuator, select Movement Input Actuator.

  3. In Details → Actuator Component → Actuator → Actuator Settings, uncheck HasYDimension and HasZDimension.

  4. Add an Actuator component, and name it LateralAxisMovementInputActuator

  5. In Details → Actuator Component → Actuator, select Movement Input Actuator.

  6. In Details → Actuator Component → Actuator → Actuator Settings, uncheck HasXDimension and HasZDimension.

  7. In Details → Actuator Component → Actuator → Actuator Settings, set Minspeed to -1.

Attaching the Direction and Distance Observer

  1. Add three Sensor components, and name them Teammate Sensor 1, Teammate Sensor 2, and Runner Sensor.

  2. For each sensor, in Details → Sensor → Observer, select DirectionDistanceObserver.

  3. The Target variable of each sensor will be set in the Registering the Agent section.“

Creating the Runner Class

The runner is constructed similarly to the tagger but with some minor changes. Please repeat the steps in the Creating the Tagger Class section with the following changes:

  1. Add the same RayCastObserver and MovementInputActuator to the runner class, but not the DirectionDistanceObserver.

  2. Set Details → Character Movement: Walking → Max Walk Speed to 490 cm/s. We will make the runner slower initially to make it easier for the tagger to catch the runner, so the tagger can learn to catch the runner at the beginning of the training. If the runner is as fast or faster than the tagger, the taggers may never catch the runner, preventing the taggers from learning. This can be manually increased during training as the tagger improves and can consistently catch the slower runner.

  3. In Details → Tags, add a new element, and set the value to Runner. This tag is used by the RayCastObserver to detect different objects.

Creating the Trainer

We will create two BlueprintTrainers, one for the tagger agent and one for the runner agent.

Creating the Tagger Trainer

  1. Create a new Blueprint Class with parent class BlueprintTrainer, and name it TaggerTrainer.

  2. Add a new boolean variable. Name it CaughtTarget. It stores whether the tagger agent has caught the runner agent in the current step. It is set by the Environment Definition blueprint.

  3. Add a new boolean variable. Name it HitWall. It stores whether the tagger agent has hit a wall in the current step. It is set by the Environment Definition blueprint.

  4. Add a new Tagger variable. Name it Agent. It stores the pawn that the trainer controls.

  5. Enable Details → Reinforcement Learning → Name, and set it to TaggerUnifiedPolicy or any string. This string determines the policy used during training so having all Taggers use the same name, makes all instances of Tagger Trainer share the same policy. Therefore the three tagger agents will train and use the same model.

  6. Set Details → Interaction Manager → DecisionRequestFrequency to 1. This makes the agent decide an action at every step, allowing faster training.

  7. Set the Event Graph as shown below.

Note

By default, Details → Reinforcement Learning → Name is disabled, and every trainer will create a separate policy. When Name is enabled and set to any string, all trainers with this same name will share the same policy. This is useful when you want to train multiple agents with the same policy. This only works with frameworks supporting multi-agent training, such as RLlib.


Define the Tagger Reward Function

We give a large one-time reward when the tagger agent catches the runner agent, and a small penalty of -0.015 when the tagger agent hits a wall. Additionally, we give a small penalty of -0.005 for each step the tagger agent takes, to encourage the agent to catch the runner agent as quickly as possible. The one-time reward is computed as 10 - (0.0005 * DistanceFromRunner), where 10 is the maximum reward for catching the runner, and -0.0005*DistanceFromRunner decreases the reward as the tagger gets further from the runner to ensure taggers near the runner are rewarded more when the runner is caught. The two numbers are chosen based on our experience and can be adjusted as needed. The per-step reward is computed as -(0.015*HitWall) - 0.005.

  1. Set the ComputeReward() function as shown below.


Define the Tagger Status Function

For taggers, the terminal state is reached when the runner is caught. We also set a max step to prevent an episode from running indefinitely. For more information on the Step variable and ComputeStatus() function, please refer to Example 1.

  1. Add a new integer variable. Name it MaxSteps, and set the default value to 2000. This stores the maximum number of steps an episode can run before ending. This may be set to a higher value if the tagger is unable to catch the runner within 2000 steps.

  2. Set the ComputeStatus() as shown below.


Creating the Runner Trainer

  1. Create a new Blueprint Class with parent class BlueprintTrainer, and name it RunnerTrainer.

  2. Add a new boolean variable. Name it CaughtTarget. It stores whether the tagger agent has caught the runner agent in the current step. It is set by the Environment Definition blueprint.

  3. Set Details → Interaction Manager → DecisionRequestFrequency to 1. This makes the agent decide an action at every step, allowing smoother action.

Define the Runner Reward Function

We give a large one-time penalty of -20 when the runner agent is caught and a small constant per-step reward of 0.01 to encourage the runner to survive as long as possible.

  1. Set the ComputeReward() function as shown below.


Define the Runner Status Function

The runner has the same status function as the Tagger Trainer.

  1. Add a new integer variable. Name it MaxSteps, and set the default value to 2000. This stores the maximum number of steps an episode can run before ending. This may be set to a higher value if you find that during training the taggers are routinely unable to catch the runner before the episode ends.

  2. Set the ComputeStatus() as shown below.


Creating the Environment Definition

We will create a SetRunnerTagged function in the environment which notifies all the trainers when the runner is caught. The InitializeEnvironment() binds a OnActorHit Event to each runner, that calls the SetRunnerTagged function when a runner comes into contact with a tagger. The ResetEnvironment() function moves each agent to a random location and resets the variables in the trainer, at the end of each episode.

  1. Create a new Blueprint Class with parent class BlueprintStaticScholaEnvironment, and name it TagEnvironment.

  2. Add a new variable named Agents of type Pawn (Object Reference) array, and make it publicly editable (by clicking on the eye icon to toggle the visibility). This keeps track of registered agents belonging to this environment definition.

  3. Create the SetRunnerTagged function as shown below.

  4. Set the Event Graph and RegisterAgents() function as shown below.


Creating the Map

  1. Create a level with a floor and four walls.

  2. Add obstacles and decorations as desired.

  3. Place a TagEnvironment anywhere in the map. The location does not matter.

  4. Place three Taggers near the centre of the map.

  5. Place a Runner near the taggers.

Registering the Agents

  1. Select the TagEnvironment in the map.

    1. Go to Details panel → Default → Agents.

    2. Add 4 new elements, and set the value to the four agents in the map.

  2. Open the Tagger class in the blueprint editor.

    1. Go to Details Panel.

    2. Search for AIController.

    3. In the drop-down, select TaggerTrainer .

  3. Open the Runner class in the blueprint editor.

    1. Go to Details Panel.

    2. Search for AIController.

    3. In the drop-down, select RunnerTrainer .

  4. Select a tagger in the map.

    1. Go to Details Panel.

    2. Select the Teammate Sensor 1 component, set the Target to one of the other taggers, and repeat this for Teammate Sensor 2.

    3. Select the Runner Sensor component, and set the Target to the runner.

    4. Repeat this for the other two taggers.

Starting Training

We will train the agent using the Proximal Policy Optimization (PPO) algorithm for 2,000,000 steps. Since SB3 does not support multi-agent training we will use RLlib for this example. The following two methods run the same training. Running from the terminal may be more convenient for hyperparameter tuning, while running from the Unreal Editor may be more convenient when editing the game.

  1. Run the game in Unreal Engine (by clicking the green triangle).

  2. Open a terminal or command prompt, and run the following Python script:

Copied!

schola-rllib -p 8000 -t 2000000 --use-attention

  1. Gradually increase the runner’s speed in the Runner Blueprint → Character Movement: Walking → Max Walk Speed as the taggers improve and can consistently catch the slower runner.

Note

The --use-attention argument is used to enable the attention mechanism in RLlib. This gives temporal context to the agent allowing it to track the velocity of other agents, as well as not immediately forget prior observations, which can be crucial in complex environments. Its use is optional. Enabling it improves the agent’s ability to navigate around obstacles, but will increase the number of training steps required.

Enabling TensorBoard

To visualize the training progress, please refer to Example 1 for details on using TensorBoard.

Related pages

  • Visit the Schola product page for download links and more information.

Looking for more documentation on GPUOpen?

AMD GPUOpen software blogs

Our handy software release blogs will help you make good use of our tools, SDKs, and effects, as well as sharing the latest features with new releases.

GPUOpen Manuals

Don’t miss our manual documentation! And if slide decks are what you’re after, you’ll find 100+ of our finest presentations here.

AMD GPUOpen Performance Guides

The home of great performance and optimization advice for AMD RDNA™ 2 GPUs, AMD Ryzen™ CPUs, and so much more.

Getting started: AMD GPUOpen software

New or fairly new to AMD’s tools, libraries, and effects? This is the best place to get started on GPUOpen!

AMD GPUOpen Getting Started Development and Performance

Looking for tips on getting started with developing and/or optimizing your game, whether on AMD hardware or generally? We’ve got you covered!

AMD GPUOpen Technical blogs

Browse our technical blogs, and find valuable advice on developing with AMD hardware, ray tracing, Vulkan®, DirectX®, Unreal Engine, and lots more.

Find out more about our software!

AMD GPUOpen Effects - AMD FidelityFX technologies

Create wonder. No black boxes. Meet the AMD FidelityFX SDK!

AMD GPUOpen Samples

Browse all our useful samples. Perfect for when you’re needing to get started, want to integrate one of our libraries, and much more.

AMD GPUOpen developer SDKs

Discover what our SDK technologies can offer you. Query hardware or software, manage memory, create rendering applications or machine learning, and much more!

AMD GPUOpen Developer Tools

Analyze, Optimize, Profile, Benchmark. We provide you with the developer tools you need to make sure your game is the best it can be!